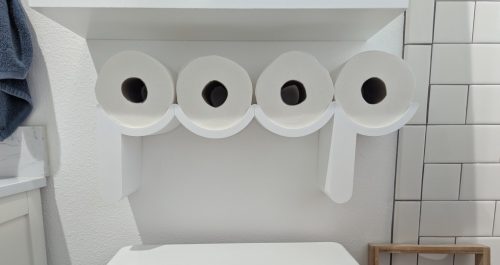
Over the last couple weeks, I decided I wanted to design my own Toilet Paper Shelf from scratch. I’d seen a similar concept on Printables.com but I wasn’t happy with how it fit together. Unfortunately, there weren’t any design files included in their posting, so I had to do this on my own and figured it would be a good opportunity to properly log my design process.
The whole point of this design is a literal “poop” joke, in that when you put the toilet paper rolls on this shelf, it spells out the word “poop.” There’s nothing particularly tricky about this design other than the size, the geometry connecting the pieces together, and how we want it mounted on the wall.
The Basics
Typically, I like to start with the subject of the design, in this case it’s the TP roll.

As I said this isn’t anything too crazy, and all we’re doing is duplicating this 3 more times.
From here, we’re just stylizing a “p”, “o”, and another “p”. So I made 3 new parts, since I knew the “o” part could be duplicated and the last “p” needed to be different from the first based on the sliding channel idea I had in my head at the time.
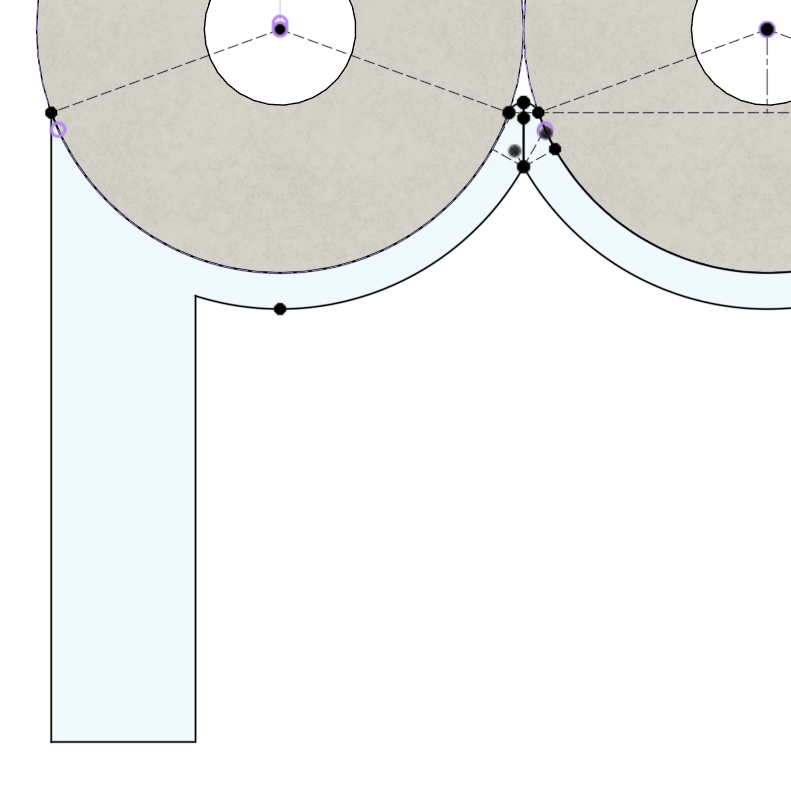
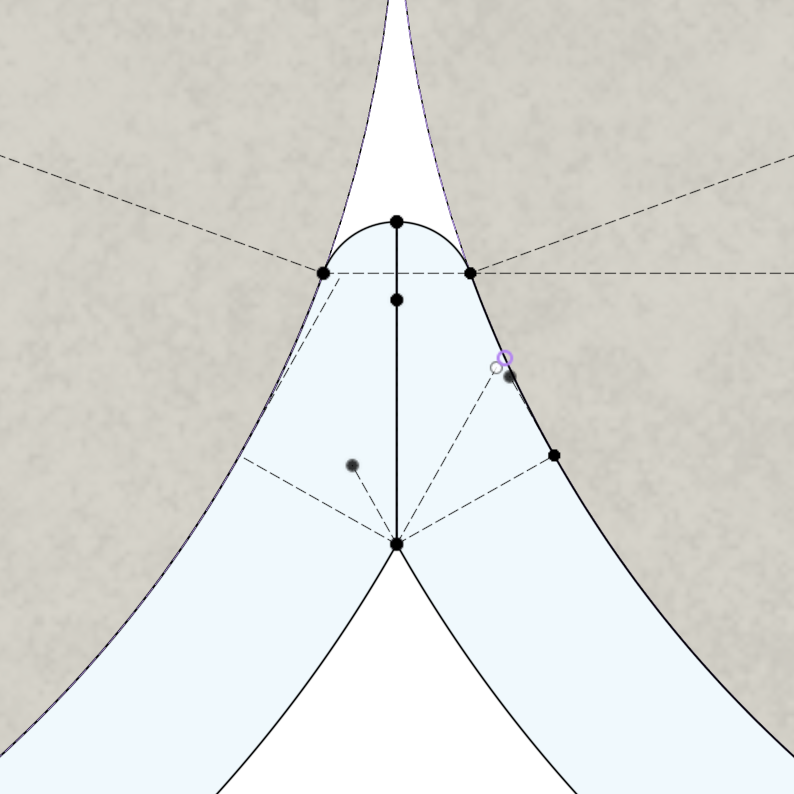
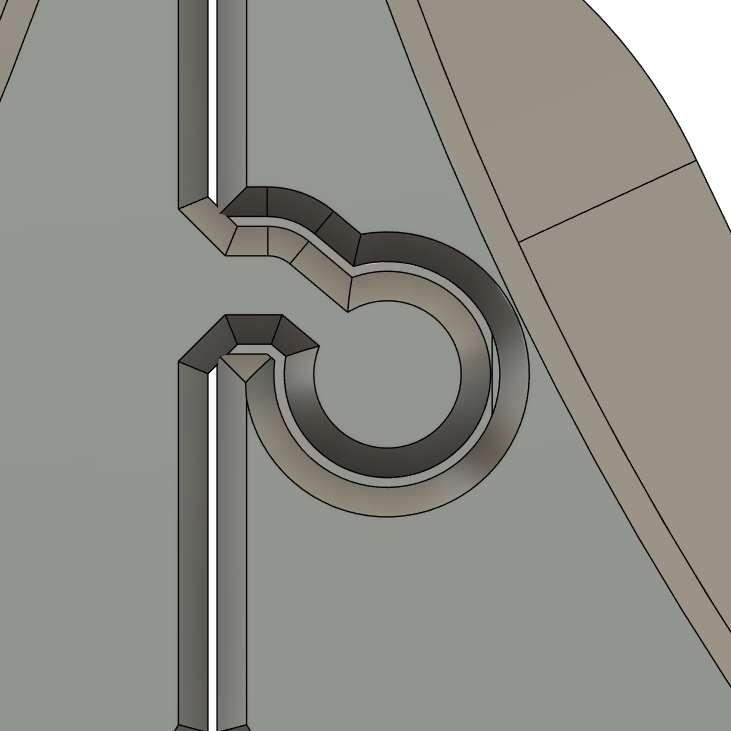
Below shows those initial sketches for the first “p” and the “o”. The edges between the letters are designed with no gap to start with. I’ll be adding clearance adjustments a little later. Many of the reference lines I use here are to make sure other construction lines are perpendicular to the tangent of the arc I’m working with. Though, as I write this, I suppose I could just run the line to the center point of the arc, and that would be the same thing, right?
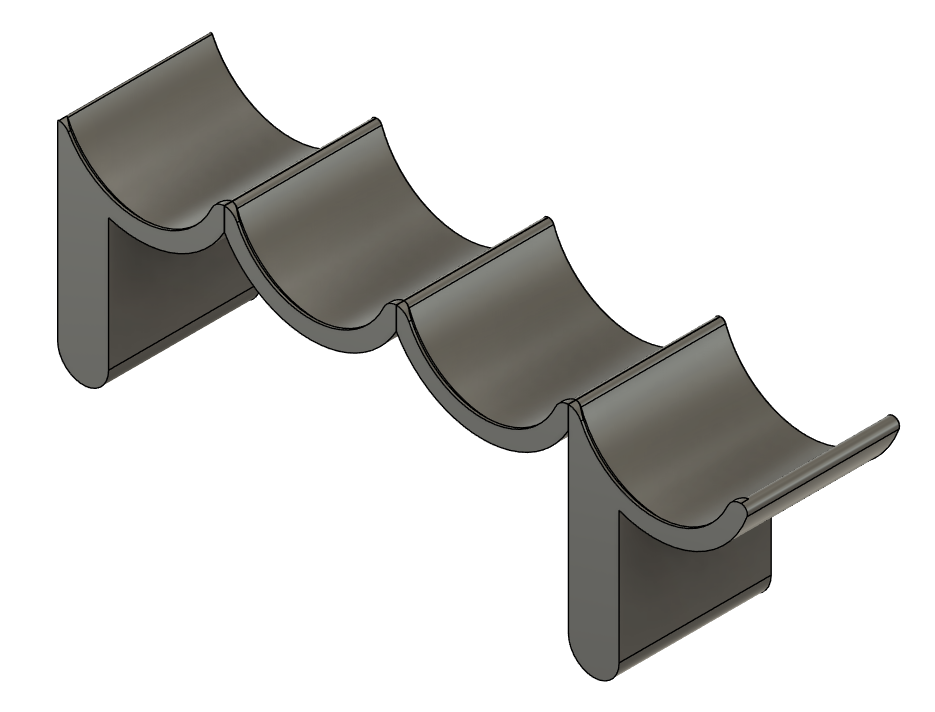
Once you’ve got that put in place, you can extrude it all out to the depth you need, adding things like a lip at the end to make sure the roll seats nicely between the wall and the end of the piece.
Version 1
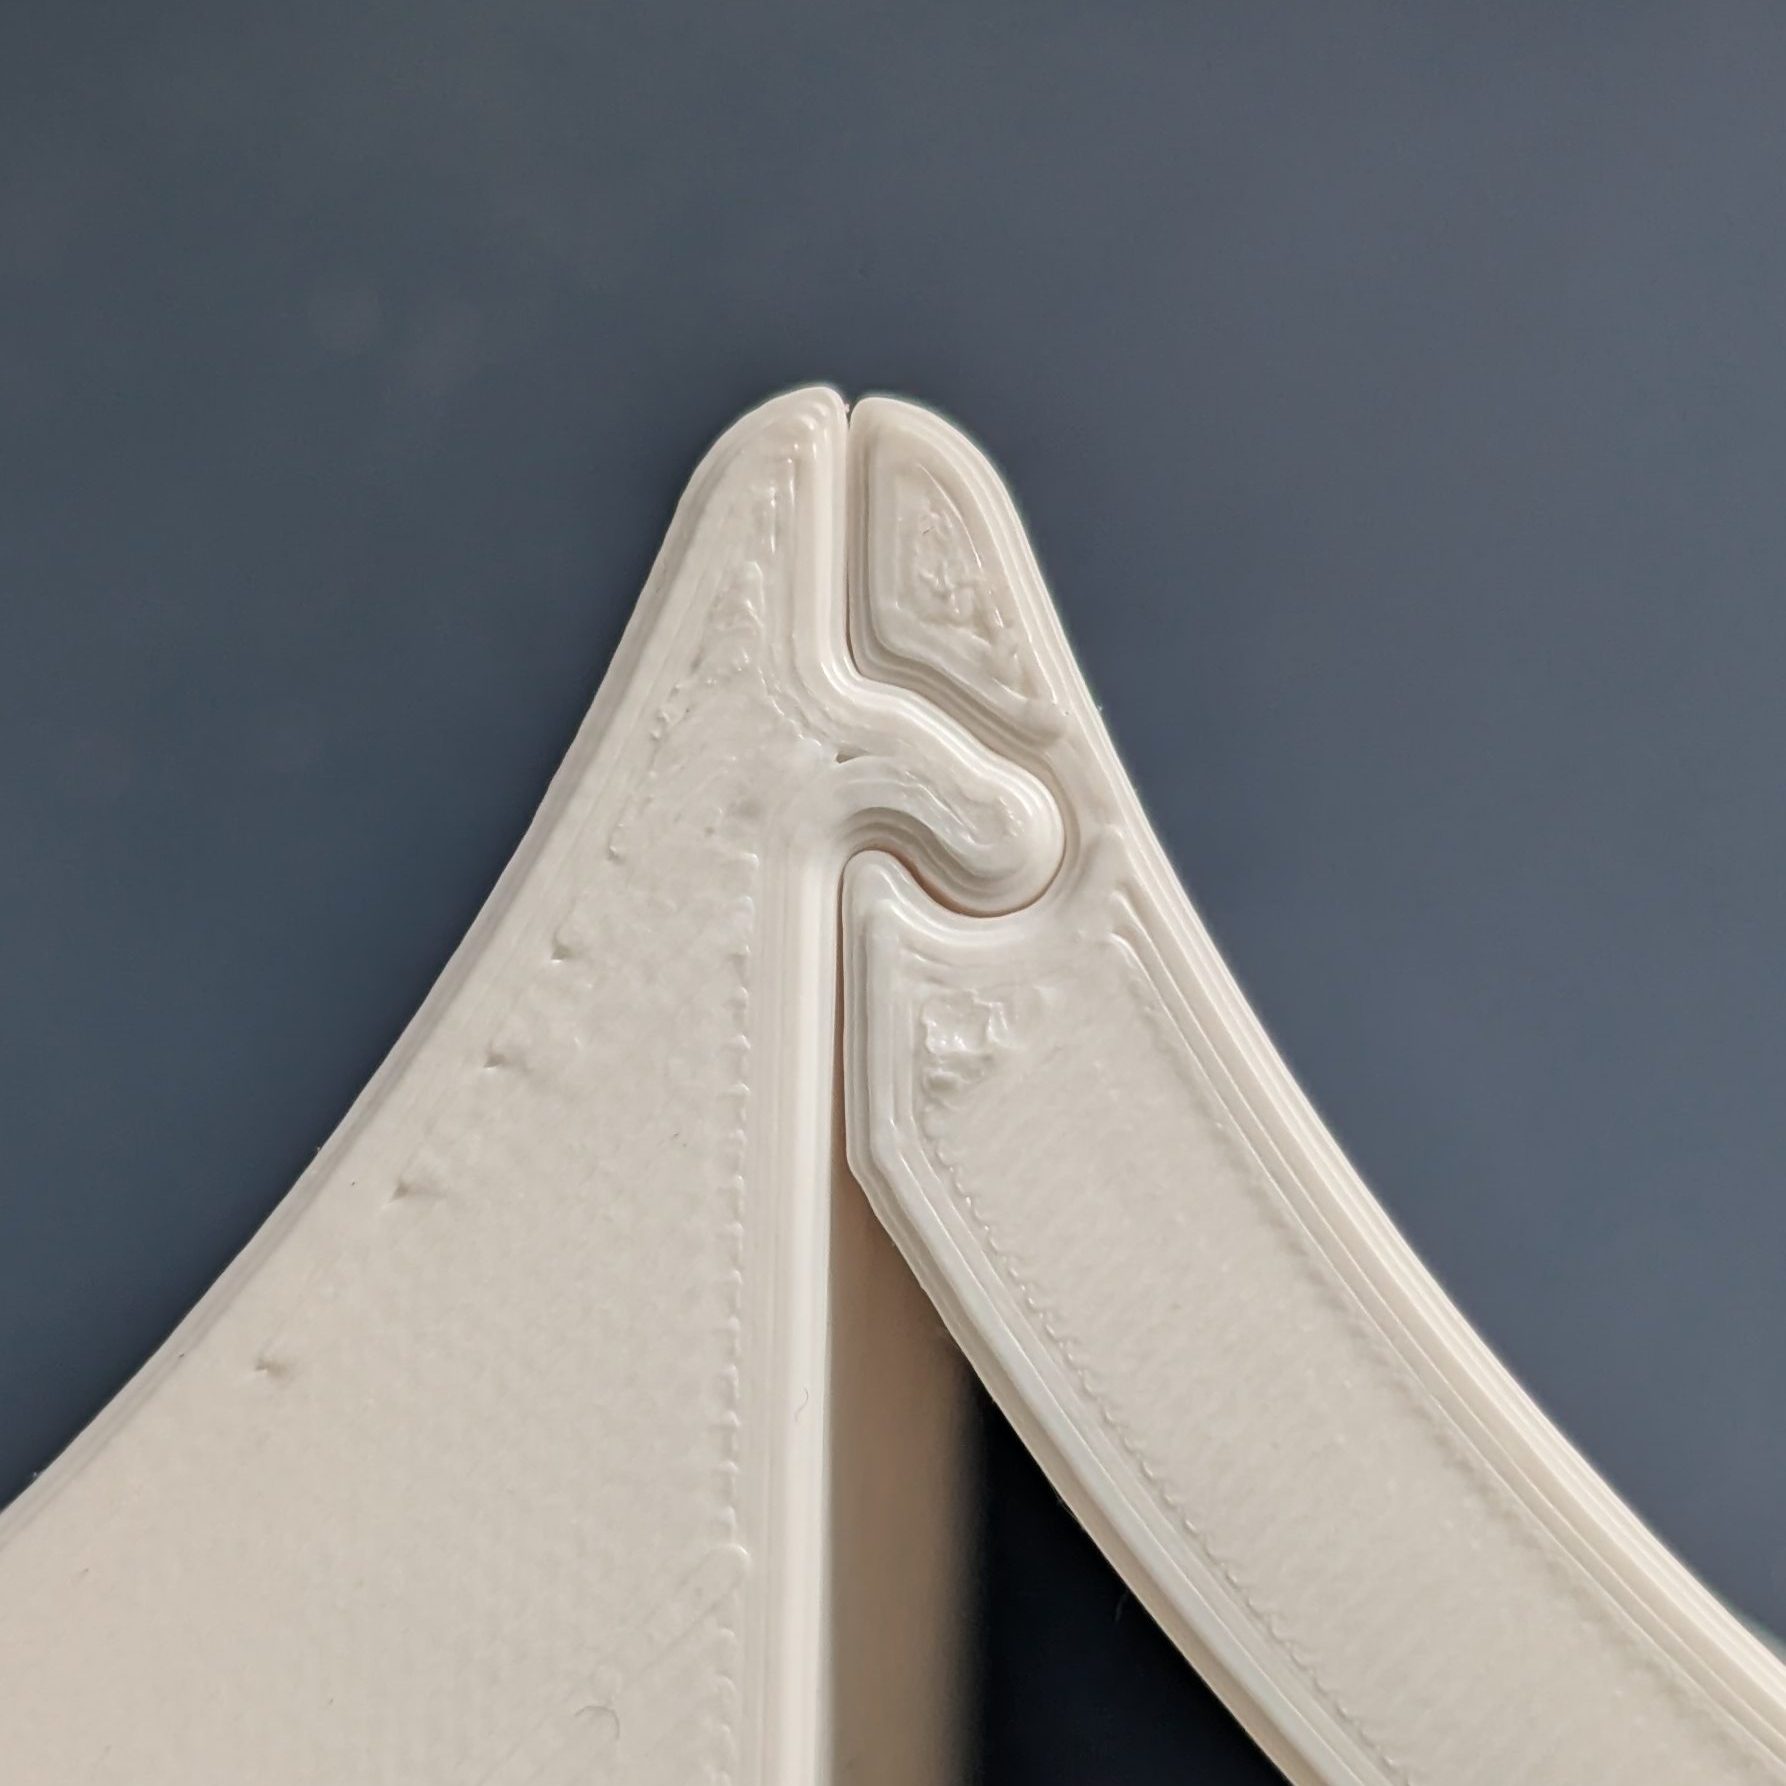
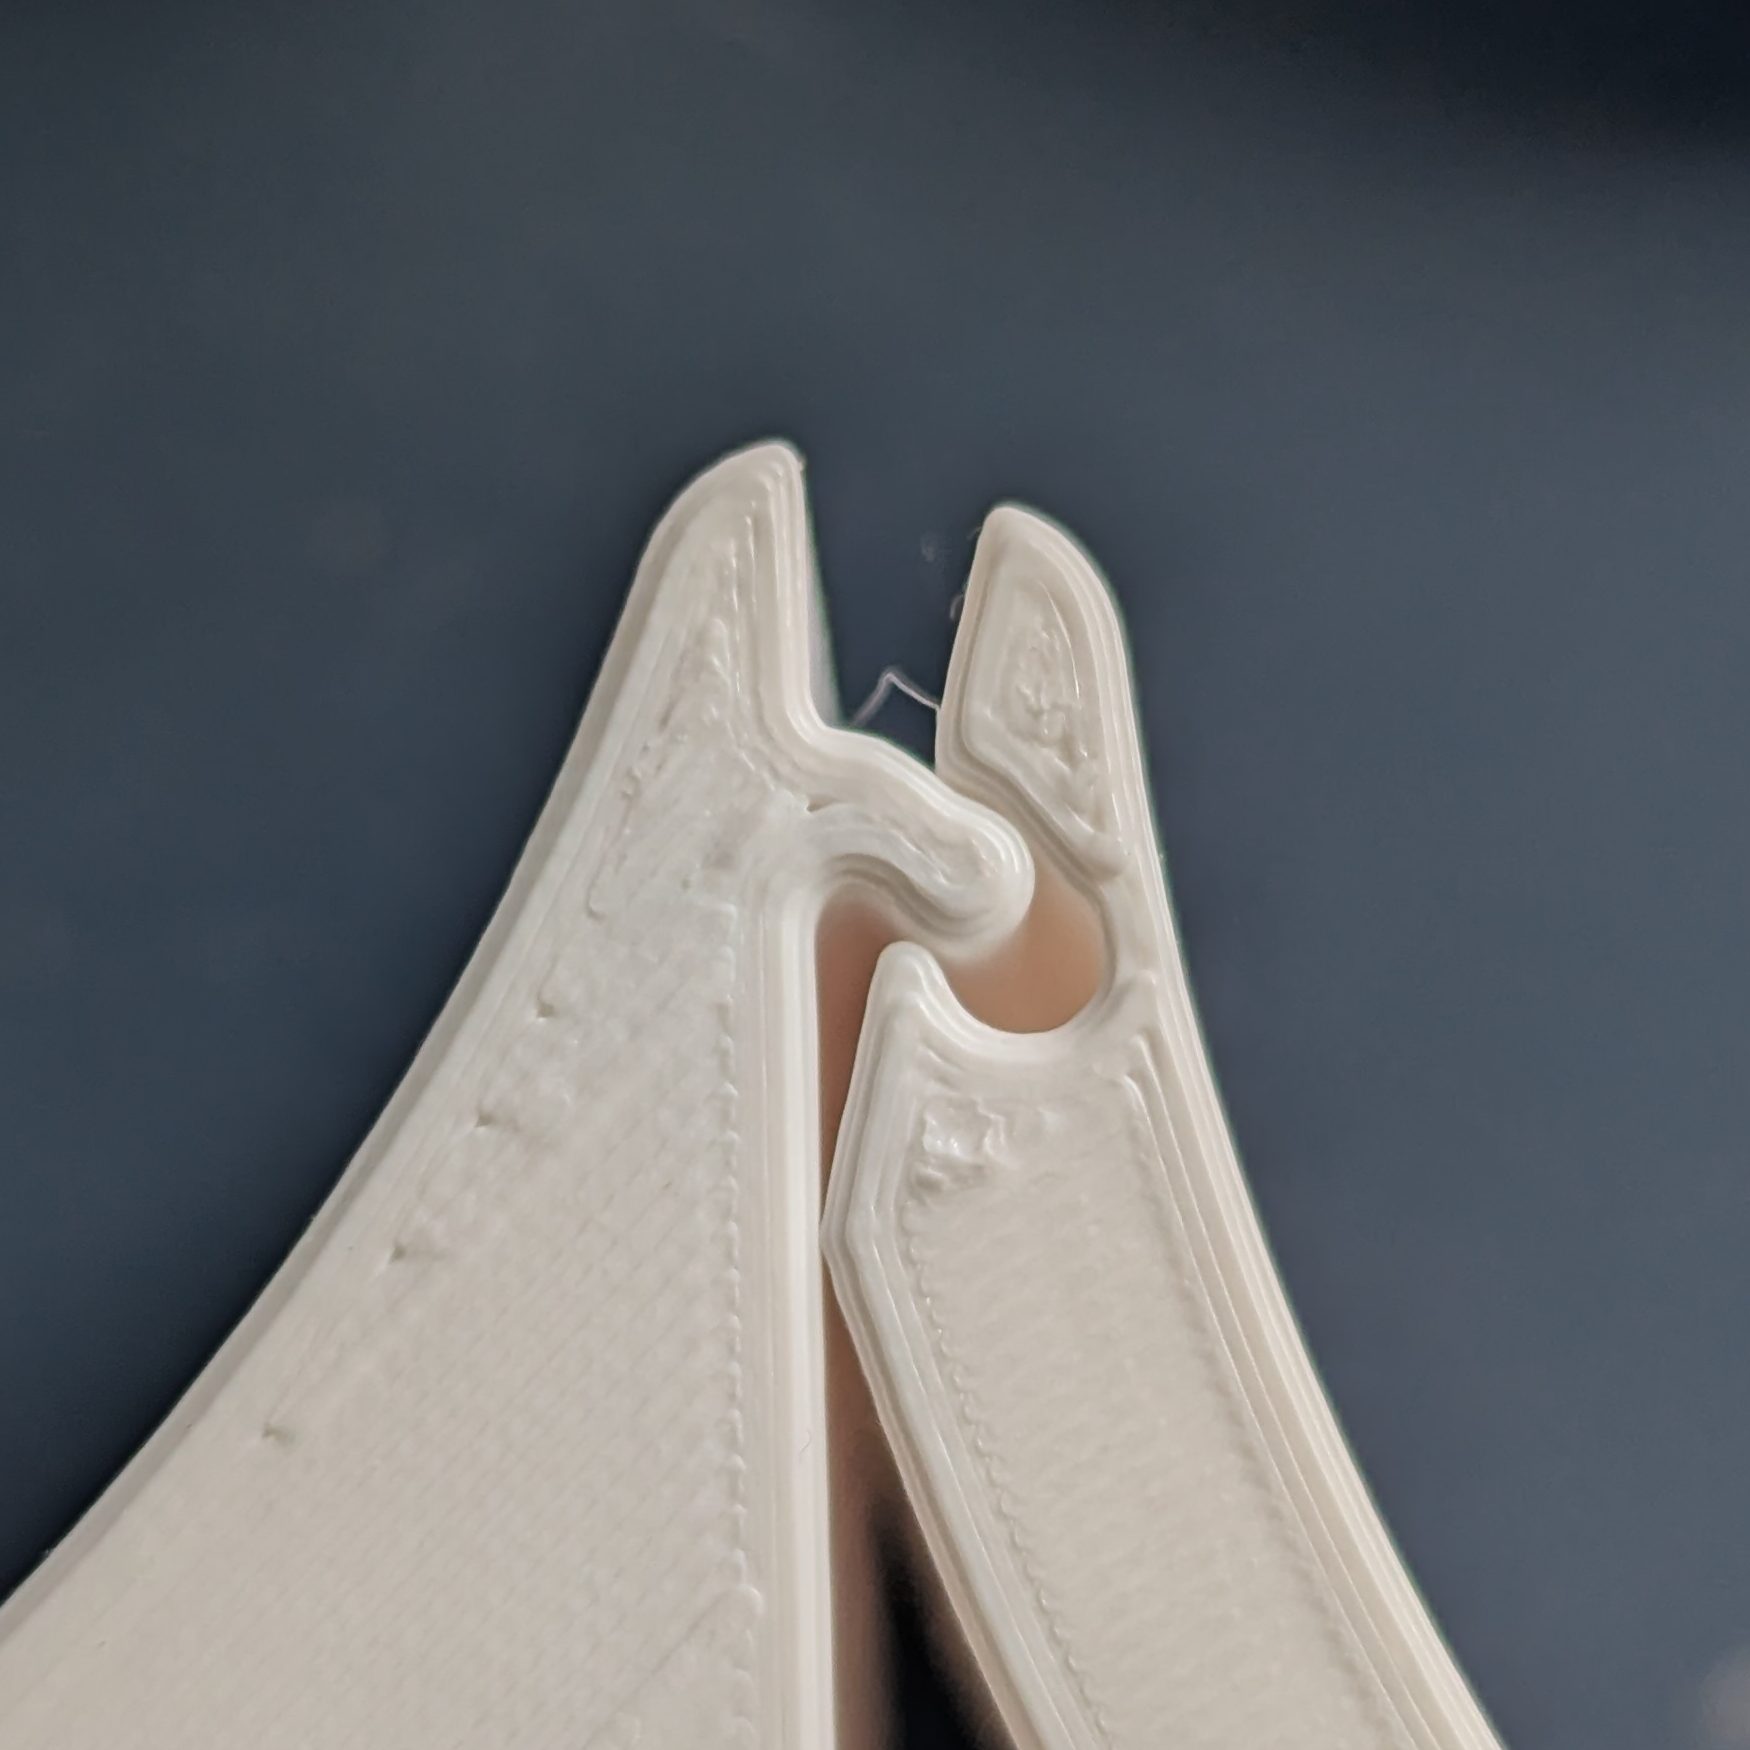
Next we need to figure out how to connect them to each other. In my mind, I had an idea of a slide which a tab would seat into to keep them all together. I was pretty pleased with the design until I’d actually printed it out and tried to use it. Then I realized I’d mostly just made a ball-detent joint. Unfortunately, in my infinite wisdom, I didn’t do a small print to prove out the design. So I wasted about 16hrs and far too much filament on something that won’t work.
Remember, kids, always scale down new designs to prototype them instead of yoloing away a whole day.
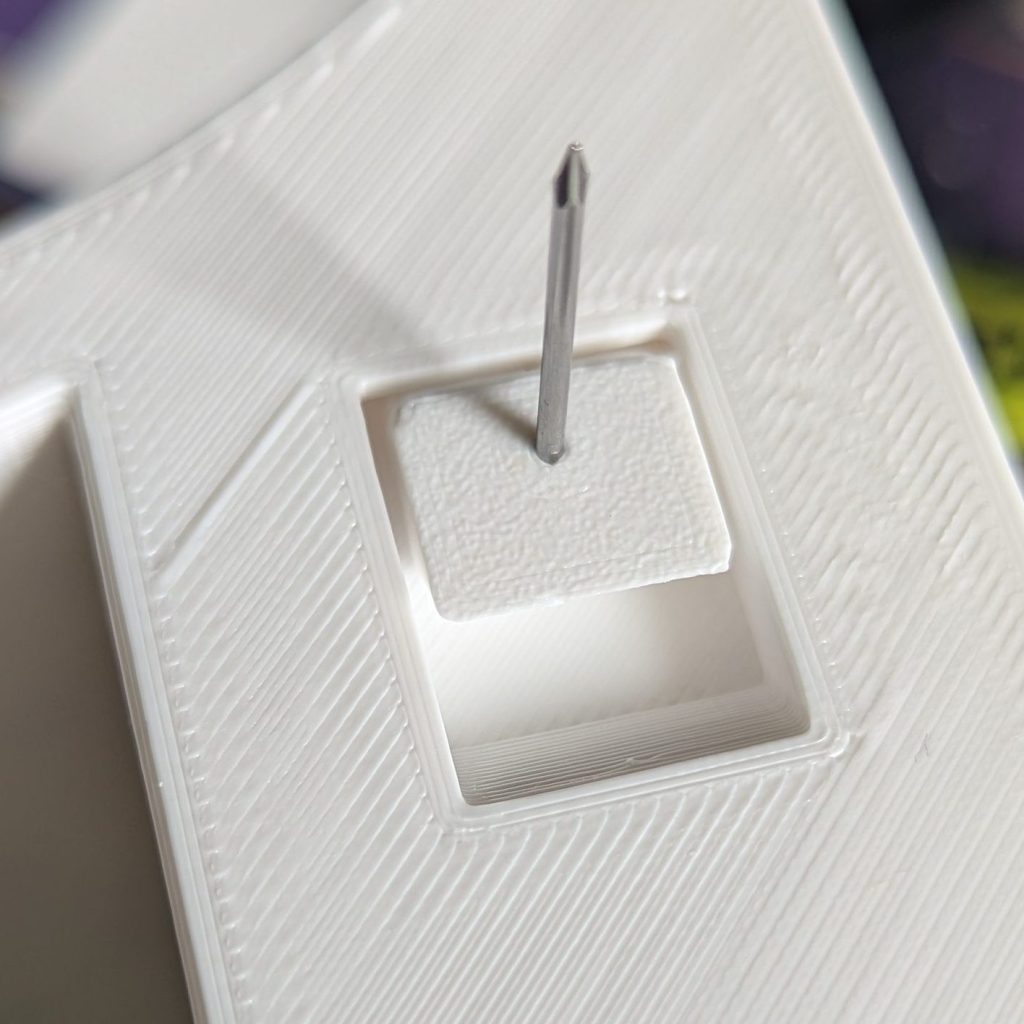
On the other side, I also needed to figure out a way to keep the shelf on the wall. Typically, I’ve just added a countersunk hole and relied on a drywall anchor plus a screw, but I wanted to try nails this time, especially since TP rolls and 3d prints are so light. I didn’t think there would be too much a problem with them pulling out.
My first go at it was trying a sort of “French cleat” design. This wasn’t great because of how light all of this stuff is, so it didn’t feel very secure. Otherwise, part of the design was to have a fair bit of “slop”, or tolerance, built in to the connection since this would be a blind install. This gives you more leeway when installing the parts, especially with there being four (or more) parts in between each cleat. Good news is that I needed to redesign these pieces anyway, so the lessons learned per print time is starting to look a bit better
Version 1 Lessons Learned
French Cleat Brackets
- Slop allowed for inaccuracies during install
- Didn’t feel very robust
- Still not overly sold on the nails, but we’ll keep going with it anywya
Shelves
- The sizing is right for the TP rolls
- The gapping between the shelf pieces is good, even if the connection isn’t
- I printed too many darker colors and didn’t clean the nozzle well enough. Maybe printing back-down will make this better
- Lots of lifting on the corners. Brim?
Connection Channel
- Ball end was too close to the channel size, so it simply slips out
- Gapping otherwise felt good
- Do smaller prototypes of stuff like this, you cocky dingus
Version 2
For this round, the goal was to tighten up the design of the wall attachment and shelf-to-shelf attachment parts of the design.
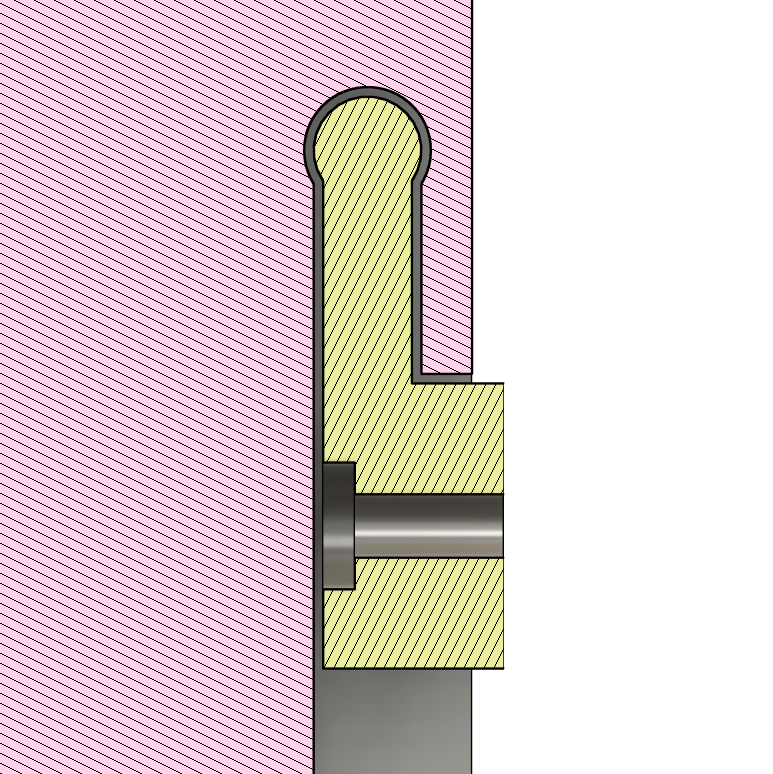
I kept the ball-end shelf connection idea, but made the “neck” thinner and the ball larger. I also tightened the gap between the pin and slot of this design to keep everything more consistently held together.
The wall attachment cleats ended up changing to a ball detent style hook. I kept the nail attachment and it so far seems to be holding up well after a couple weeks. Worst cast, I can redesign JUST the wall cleats to fit a proper flat head screw, which is only a 30 minute print on my Prusa Mk3S.
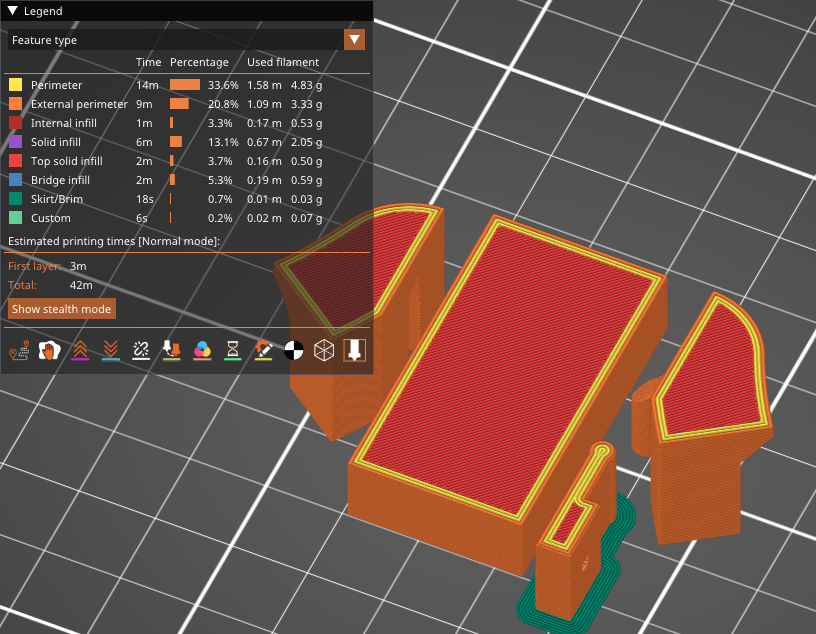
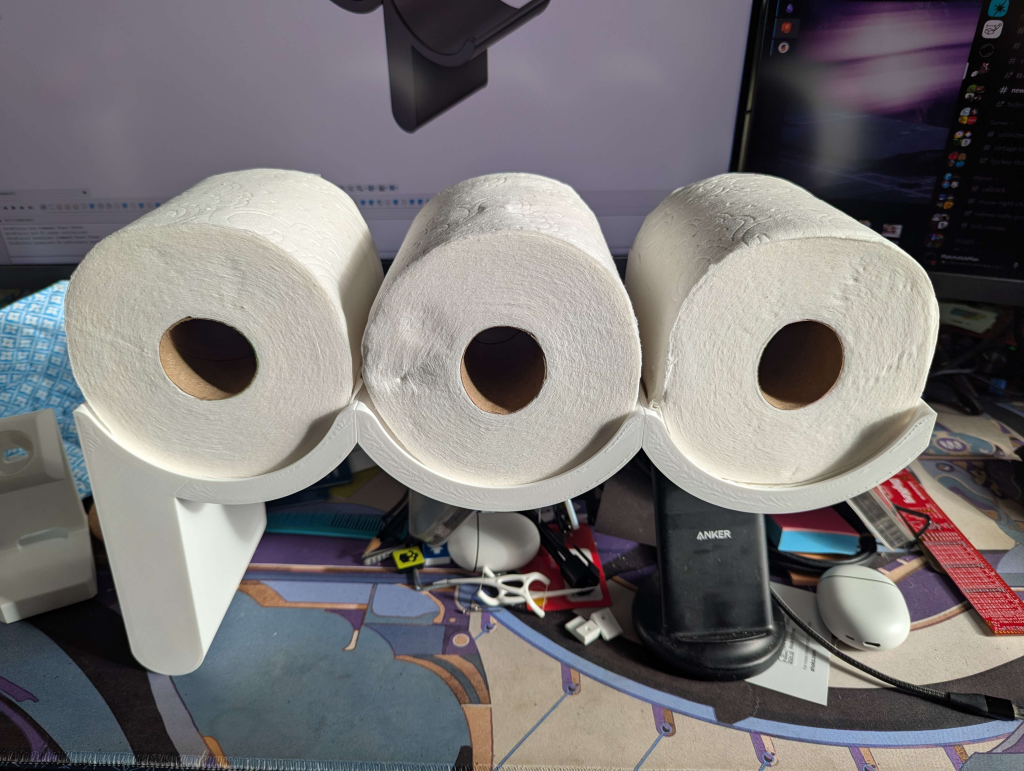
These smaller test pieces only took 42 minutes to print out, which is much more reasonable to flesh out these sorts of ideas.
These small tests worked great! So I went ahead and modified the design proper and started printing parts. It was about 24 hours of total print time for all the pieces. The “O” pieces needed a brim to keep connected to the plate, and of course the cleats, but otherwise went off without a hitch!
A couple picture nails later, I had it mounted up in our bathroom!
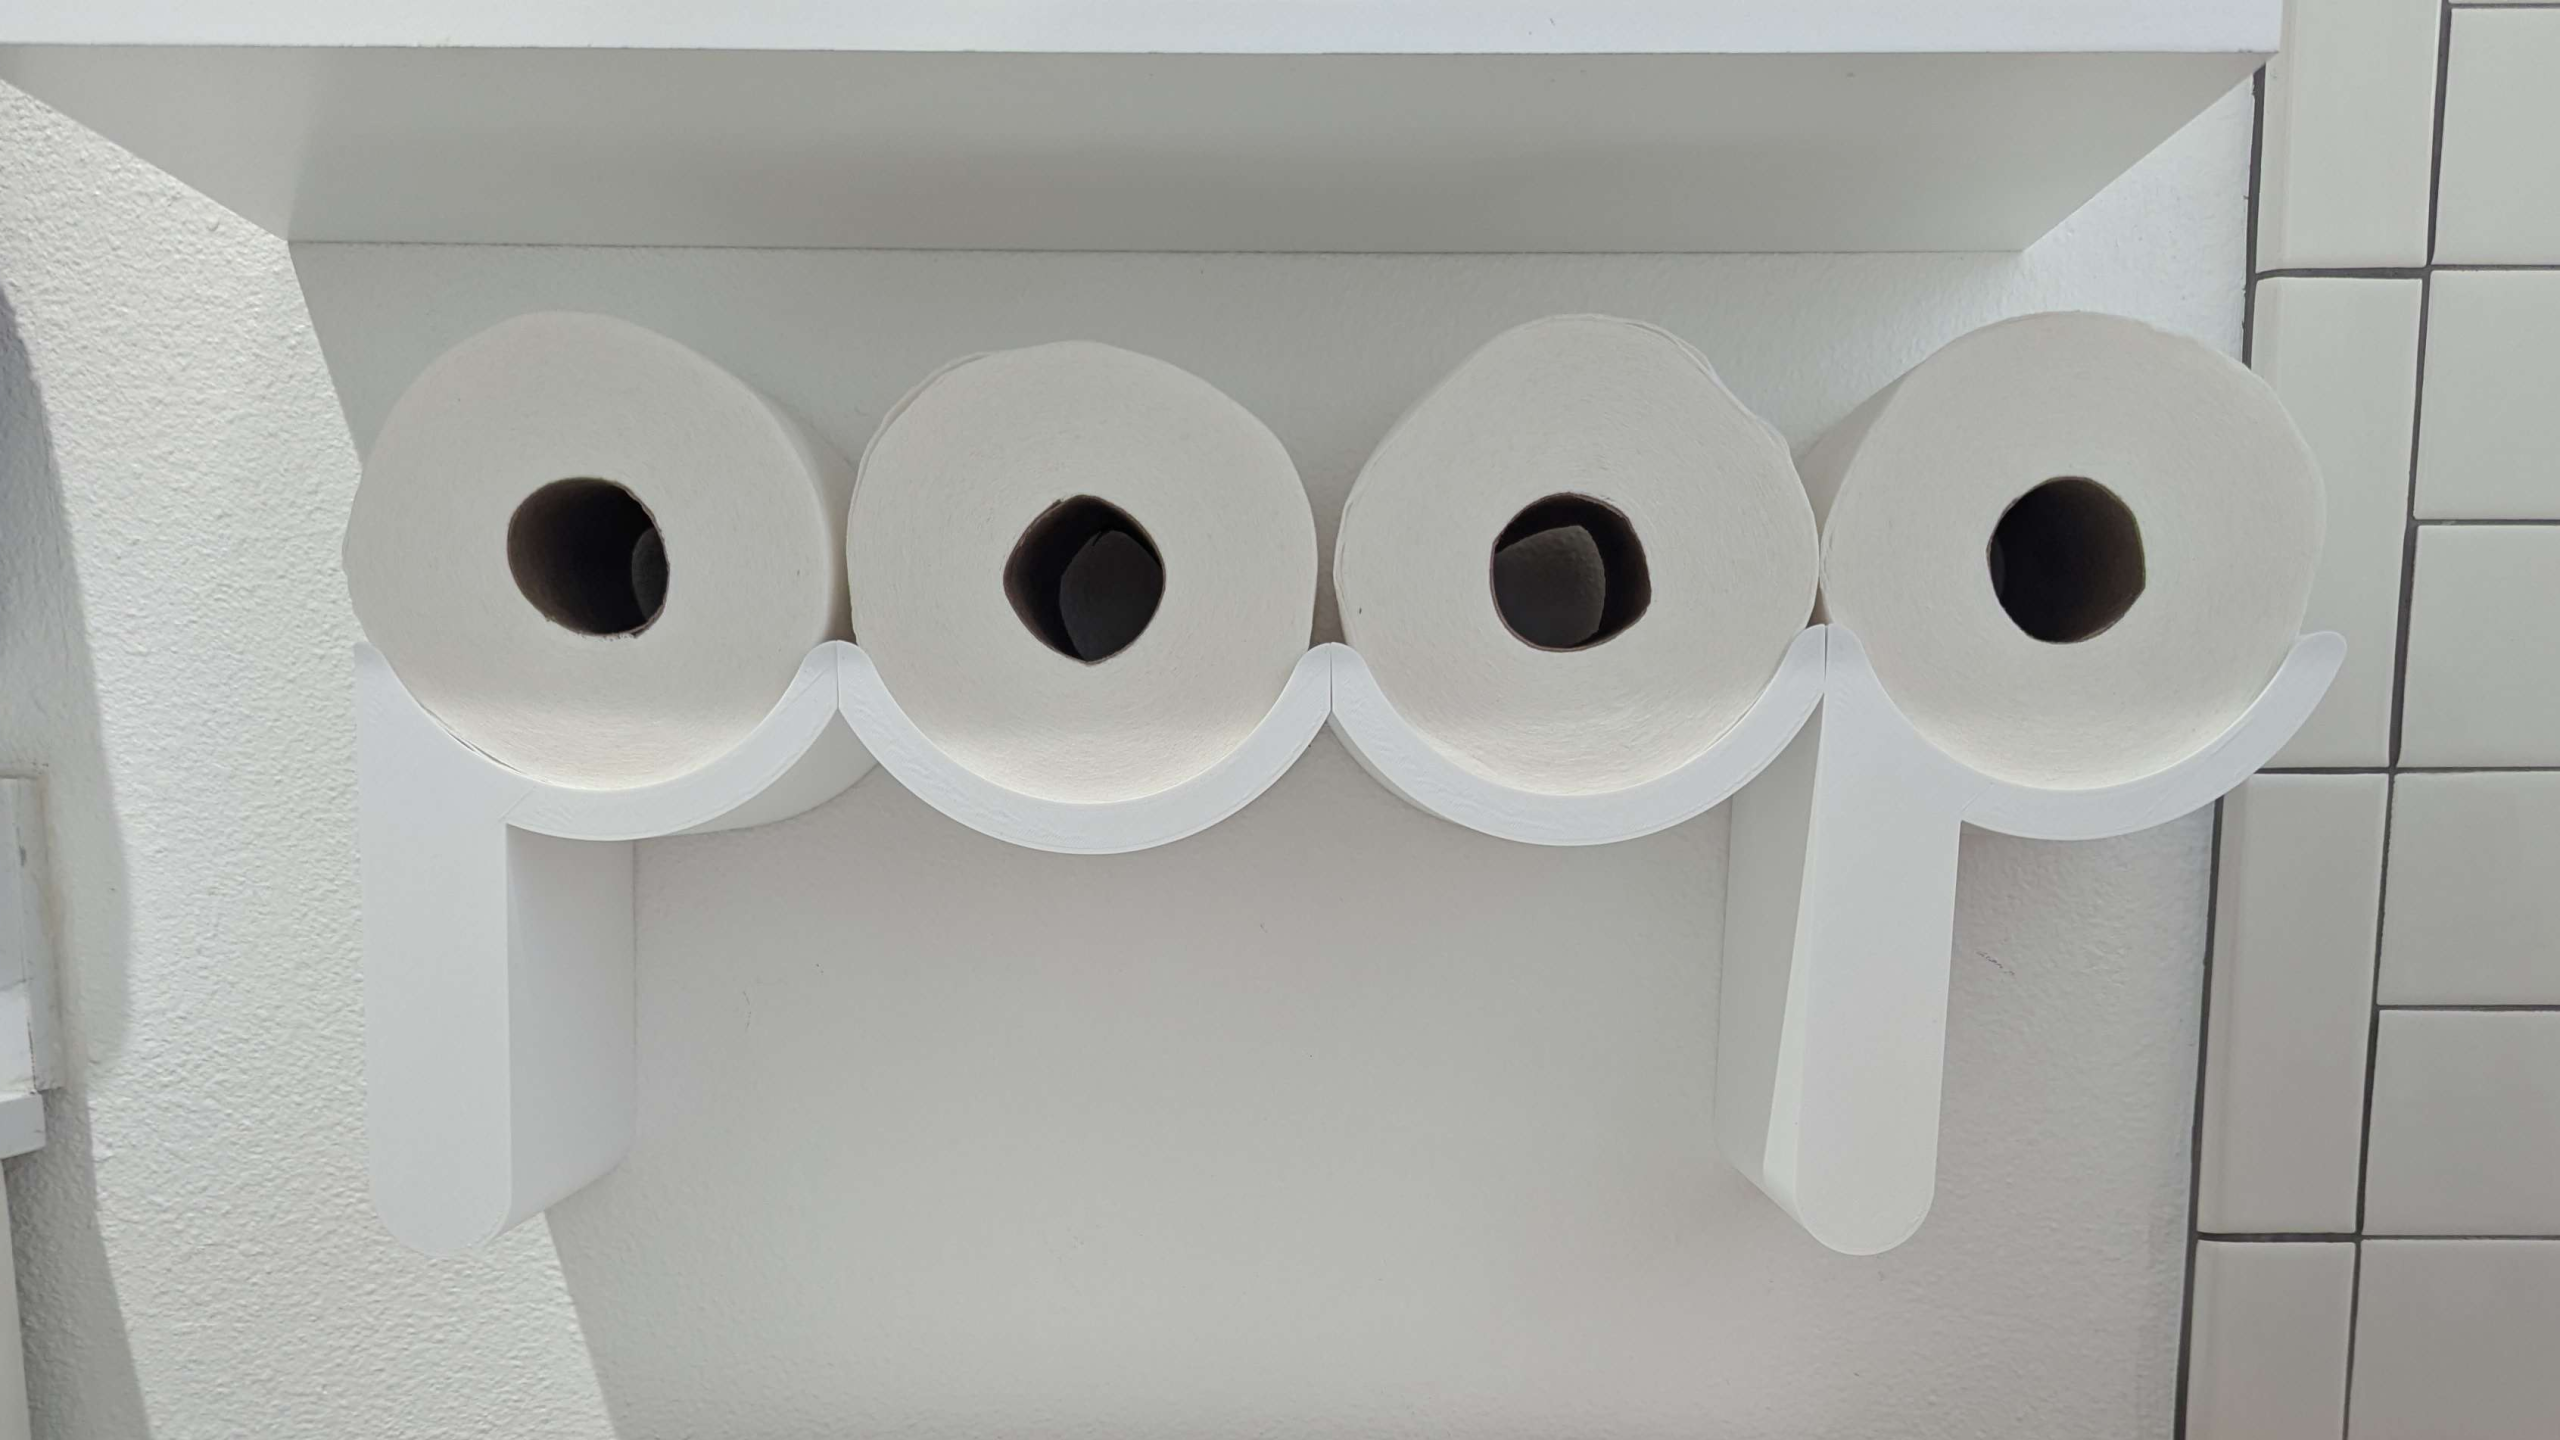
The nail cleats in this designs are almost exactly 401mm apart, which feels purposefully obnoxious, but it was in fact just a happy accident.
Thank you for reading!
What did you think of this process? What might you have done differently? I’d love to hear your thoughts.
You can print your own on Printables here. Feel free to remix. I’d love to see what you come up with!